Wednesday 8 November 2017

How to change default database server instance for SharePoint

Today we will see how to change the Database server instance name in SharePoint to get created Content DB by default in specified SQL instance.
In our case, we had one instance set default to get Create content under the same which is decommissioned recently but still, we are getting the old instance name under the Content DB page when we are trying to create the new CD.
Below are the steps to follow the same:
  • Open Central admin and click on Application Management option available left side of the screen.
  • Now select Specify the default database server under Database option, see below:

  • Here we will get an option to change the Content Database server name, we need to specify where to create content DB by default. Enter the SQL instance name where you want to create CD and click on ok, if you are using SQL server authentication, select account name and Password.

  • Once done, you may face an issue that database server instance is still showing as old, if yes please do IIS reset to take reflect on the same.

Tuesday 7 November 2017

SharePoint Visio-Bug: The server failed to process the request

A Developer reported that they are not able to open Visio file in SharePoint site level, they are getting error like “The server failed to process the request”.
Here are the steps that we need to follow to fix this issue:
This solution will work SharePoint 2010,2013 and 2016 as well.
  • Login to the server and verify the Visio service Application is created.
  • To check the same, go to CA>Click on Mange Service Applications
  • Now navigate the page down and verify Visio Graphics Service Application is created and started
  • Also check from Central Administration>System Settings>Mange services on server and checked if the Visio Services were running:


  • Now, we will open SharePoint Management Shell with Admin rights and execute below given command.

Get-SPServiceApplication -DisplayName "{Visio Graphics Service Application}"


  • Now execute below command to find the Service account used for Visio service Application.

Get-SPServiceApplicationPool -Name "Visio Graphics Service Application"

  • Now we have Service name and service account name, now we need to get Content Db name for Site and assign the SPdataAccess
  • To get site collection Content DB there is two ways to get the same result, one is from PowerShell command and other one using GUI mode, Executing the command will be easiest way to get Content DB name and SQL server instance name.

Get-SPContentDatabase -site http://contoso.com/sites/test
Result would be like below screen shot:
  • Now login to the SQL server with above server instance name and verify the above given service account is added under SQL security group or not, if it’s not added; add this user
  • Right click on Added user and click on User Mapping option, there will be many db name available identify the Content DB which you got from site collection URL.  
  • Now select that db and assign SPDataAccess permission to the same and click on ok.


  • Now go back to the site and open the Visio File and you will get the vision opened on the Page.

Tuesday 31 October 2017

Nintex Menu not showing in Site Actions SharePoint


We found Nintex Menu not showing in the Site Actions SharePoint, After Nintex features activated on the same site. We have deactivated and reactivated the site collection feature and site features and still, nothing was happening. This issue exists for entire web Application
There is a workaround for this issue, we need to add safe control in web config file for respective web Application. We need to add the same in all web front end servers.
If we are searching on the internet, Nintex will suggest us to re-install or update the Nintex solution file.
Below are the simple steps to fix this issue in a minute:
  • Login to the server, open web config file for issued Web Application, make sure you have backup the existing Web config file.
  • Once web config file Search for Safe control (There will many searches for this keyword) just pull the page at end and get as per below screen shot:

  • Before closing tag, add below safe control and save this config file.
<SafeControl Assembly="Nintex.Workflow.ProjectServer, Version=1.0.0.0, Culture=neutral, PublicKeyToken=913f6bae0ca5ae12" Namespace="Nintex.Workflow.ProjectServer.ServerControls" TypeName="*"Safe="True" SafeAgainstScript="False" />
<SafeControl Assembly="Nintex.Workflow.ServerControls, Version=1.0.0.0, Culture=neutral, PublicKeyToken=913f6bae0ca5ae12" Namespace="Nintex.Workflow.ServerControls" TypeName="*" Safe="True" />
<SafeControl Assembly="Nintex.Workflow.ServerControls, Version=1.0.0.0, Culture=neutral, PublicKeyToken=913f6bae0ca5ae12" Namespace="Nintex.Workflow.ServerControls.WebParts" TypeName="*"Safe="True" />

  • Do the same for another server, App recycle may be required after this entry in the config file.
  • We can our result output like this

How Save my email attachments to a SharePoint document library using MS Flow

Prerequisites


  • You should have Ms flow Subscription assign to your Account
  • User Must have SharePoint Site access and Docs library should be created

Step by step Solution with screenshots

  • First log in, using your business account.
  • Click the “flow” option, shown on top of the page, as shown below.
  • Scroll down the page and select SharePoint on given option under popular services.

  • Once selected the above option it will take us to SharePoint Flow action, will be able to see the flow templates from Microsoft.
  • Here can search for template by clicking on search option or can select template by scrolling down. 
  • Select “Save my email attachment to a SharePoint document library” template.
  • Next, screen will be shown, as shown below and click Use this template.

  • Click on continue option.
  • On the next page, we will be getting option to configure Ms flow to get email attachment move to Site Library.


  • First, we need to change name and assign according to our convenience.
  • Next, click on On New Email option and select folder from where you want to copy the email attachment.


  • Once folder selected, next option is to Apply to each attachment on the email.
  • Here select an out from previous steps, by default attachment will be selected.
  • On the create file option, site address should be your Office 365 SharePoint site.
  • Select folder path, and select the Library which you have created or you can select default shared folder.
  • File name and File content, we can keep default.


  • Now click on Create Flow, you will get message that your flow was created to exit, click done.


  • Now, your flow is ready to test. Please send a test mail to your Email with an attachment. It will create a file in SharePoint site ->SiteAssests library.
  • Once any one sent email with attachment, MS flow will get trigger automatically and save your email attachment to defined Library.


  • Above will be job history one you will get email and Flow will get trigger.


Friday 4 August 2017

How to take Backup of WSP in SharePoint Server using PowerShell Script


Hello All, Today I am writing about How to take Backup of WSP in SharePoint Server using PowerShell Script.
WSP (Windows SharePoint Solution) WSP files are CAB files including all set of features and functionality, site definitions, services and other required custom availability. WSP files can be reuse and easily deploy to other SharePoint farms, in case if we have not configured Web Application URL under the same WSP.
Below are the steps to take backup file existing solution using SharePoint PowerShell:

·         Login to the server and run SharePoint PowerShell management Tool as Administrator.
·         Once PowerShell opened copy the below script and hit enter

$farm = Get-SPFarm
$file = $farm.Solutions.Item("Solutionname.wsp").SolutionFile 
$file.SaveAs("c:\Solutionname.wsp")


Once above command executed we can get wsp file on given file.

Thanks


Monday 1 May 2017

How to change List and Document Library Web URL in SharePoint

Today I am going to write about “How to change List and Document Library Web URL in SharePoint
”, This is an important task which admin use to do.
Description: we have a requirement to change List or Doc library web URL, if we will try to change from the user interface, it won’t allow us to do the same. We can change List or Library name, it means we can rename the List or Library Name but it won’t effect for Web URL of the same List.
We can change List or Library Web URL using SharePoint Designer and use PowerShell. In case we have don’t have installed SPD in our local system, in that case, we can use PowerShell which will be default Available.
We are going to show how to Change the URL of a SharePoint list or library using PowerShell:
  • Default If we will open any List or Library it will be appended with List or Library name and be ending with aspx which is the extension.
  • We are creating new List and will perform PowerShell script to change Web URL in easy steps.
  • Create New List and you can see the List we URL will be List Name default, refer below screen shot:


  • If we will try to change the Same List URL using User interface, we could not find any option to do the same.
  • So now Open SharePoint Management Shell with Admin rights and update the below script as mentioned:
  •   In case if you are not using PowerShell management shell, then use the first line of code about Add-PSSnapin.
  • Very first Line of the script we will variable to store the Site or Subsite URL, in case if you are using Site Collection, use Get-SPSite instead of Get-SpWeb.
  • Then List name which you want to change the URL, once all done move to next line of code and enter the URL name which you preffer to change next to List/
Add-PSSnapin Microsoft.SharePOint.Powershell
$List = $List = $Web.Lists["Test for URL Changes"]
$List.RootFolder.MoveTo("/sites/ admin/search/Test_team/Lists/test")

Note: Make sure any white space should not take place.


  • Now we are ready with the script, we will execute the same Code to PowerShell, check the List URL.
  • After executing this script we can see the result, List web URL will get change, page view will not change only List Web URL will get change, refer below screen Shot:


Monday 27 February 2017

Working with Images in a SharePoint Online

In this article, we will describe all about working with Images in a SharePoint Online.
Today, I am talking about Images in SharePoint and uses of the same, in this article I will be discussing shot about Picture library and we will have demo for various way to upload and add images in SharePoint Site pages.
  • About Picture Library
  • How to add Pictures in Library and Page with various ways

Let us start from one by one as said above:
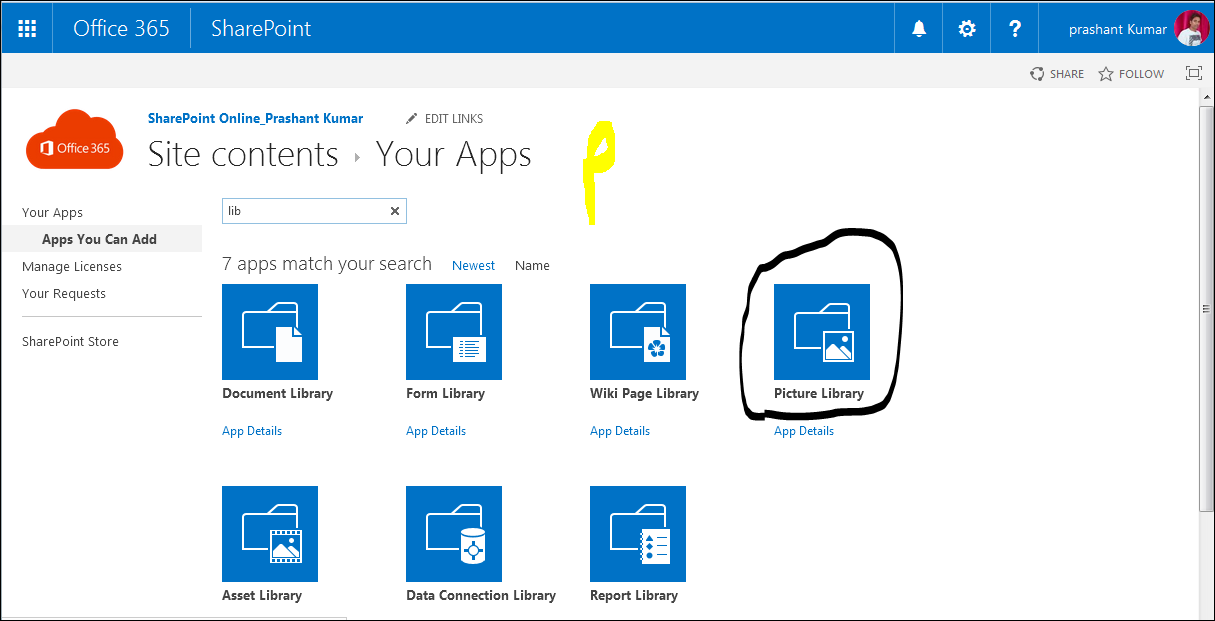
About Picture Library:  It is inbuilt library from SharePoint online which enable us to share collection of digital pictures or graphics. We can upload images to picture Library from site such team site, Blogs, Wiki or other publishing site. We can Use the same images from anywhere in the same site collection and can access centrally. Picture Library is inbuilt Application and Web part for SharePoint online or On-premises from 2010 version. If we will see in the SharePoint site collection there will be three type of Image Library will be showing under the site contents page:
Picture Library
Wiki Page Library
Asses Library
Below is the screen shot for Picture Library from SharePoint Online:

How to add Pictures in Library and Page with various ways: In this section, I will describe more about how to add picture in the Picture Library or other page in the SharePoint Online in multiple ways.
Let us start one by one adding images in the SharePoint page:

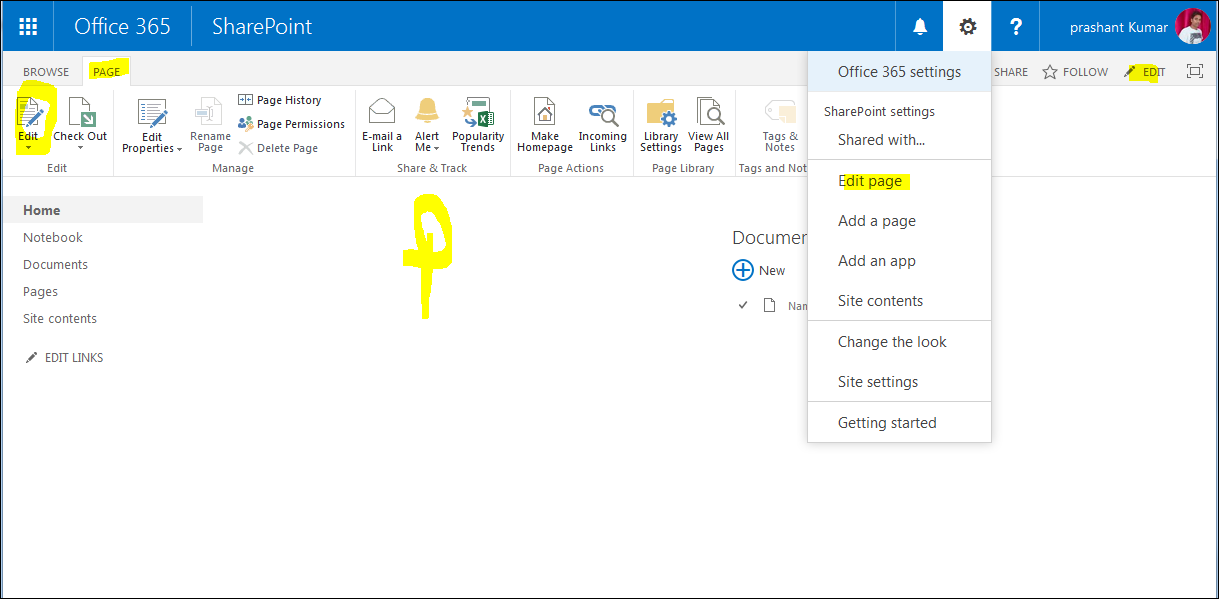
  • Open any site page of SharePoint online, click on edit from the Ribbon and Page tab or left side edit option will be available, also can edit the page from site settings gearbox and select edit page. Below is the Screen shot for all above said option:
  • Now remove default, Get start web part and we will see how to add images here.
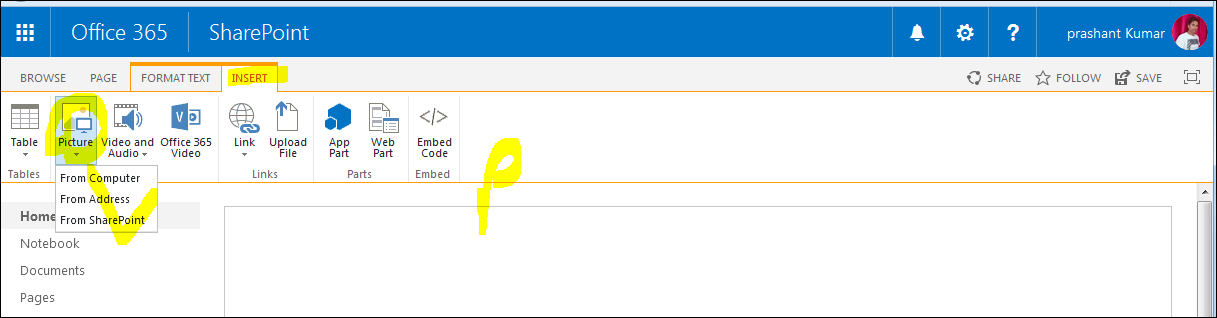
  • Click on Insert tab from SharePoint Online Ribbon page and click on Picture, it will get drop down option with three option: From Computer, From Address, From SharePoint
From Computer:  If we are selecting from computer option from insert image on SharePoint Online.
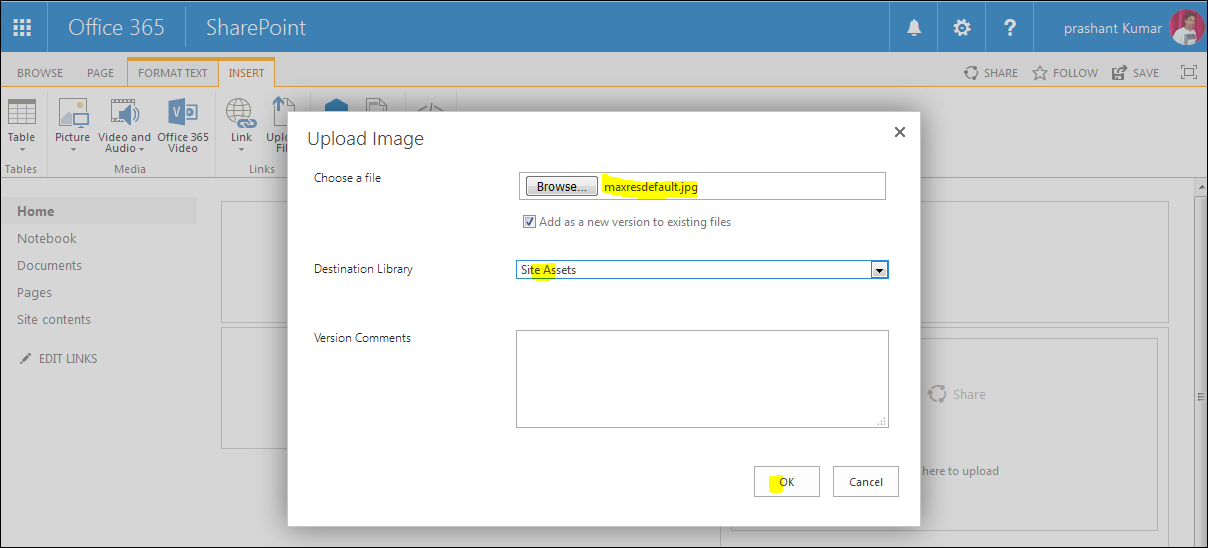
  • We need to browse and Upload Image from Local system. Select path by clicking on Browse option, check box for existing same name, and add new version for same name of image.
  • Select destination Library by default Site collection Image Library will be selected, you can select other Images from other available library drop down box.
  • Version Comment: write a comment and click on ok, see below screen shot for more details:

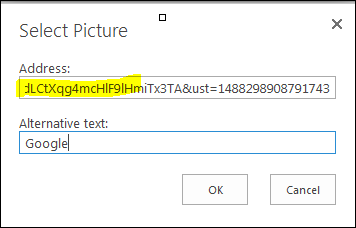
From Address: using this option we can copy any available image on the Internet and can insert to any of page.
Note: If copied Link image will be deleted from destination folder or URL, Image will be unavailable from inserted page.
  • To add from address click on Image drop down box and select add from address, one POP up box will get open paste url and enter alternative text and click on ok. See below result:

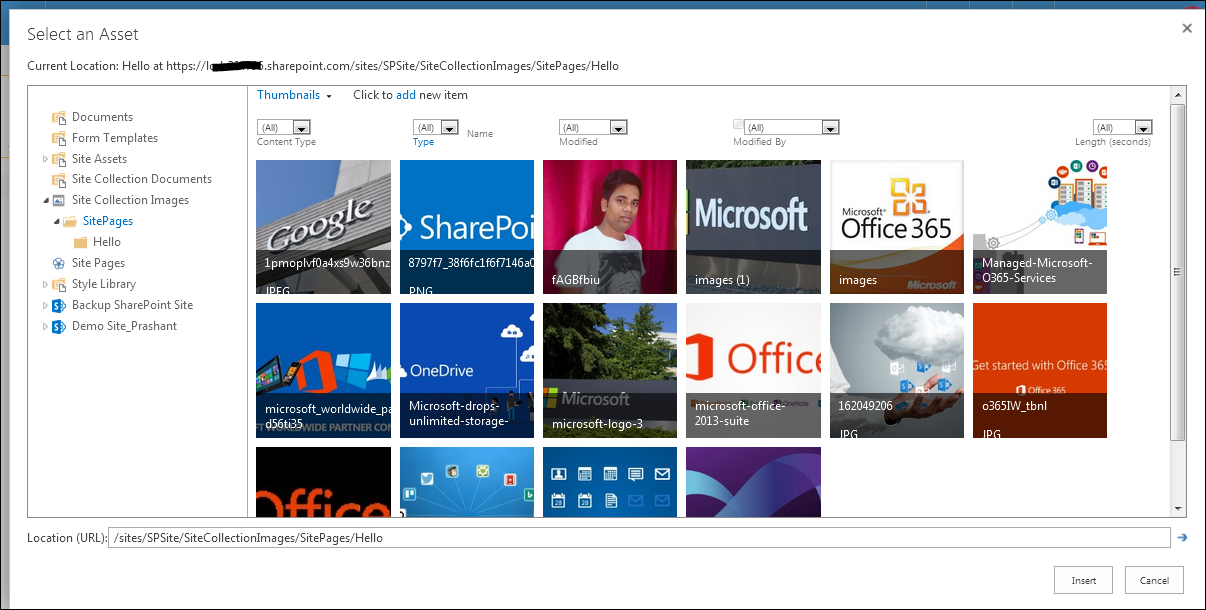
From SharePoint: We can upload images anywhere from available in the SharePoint site collection. From the same site collection we can use for any of Library page, subsite or others..
  • To add images from SharePoint option under the Image: click on the from SharePoint and it will open in new wizard of select an assets, Here select images from available library or enter URL within the same Site collection and click on Insert.
See below screen shot Result:
Above steps were from Insert Image option, now I will show some other way to upload or add images in SharePoint Online.
Copy and Paste: We can add image just by copy and paste option.

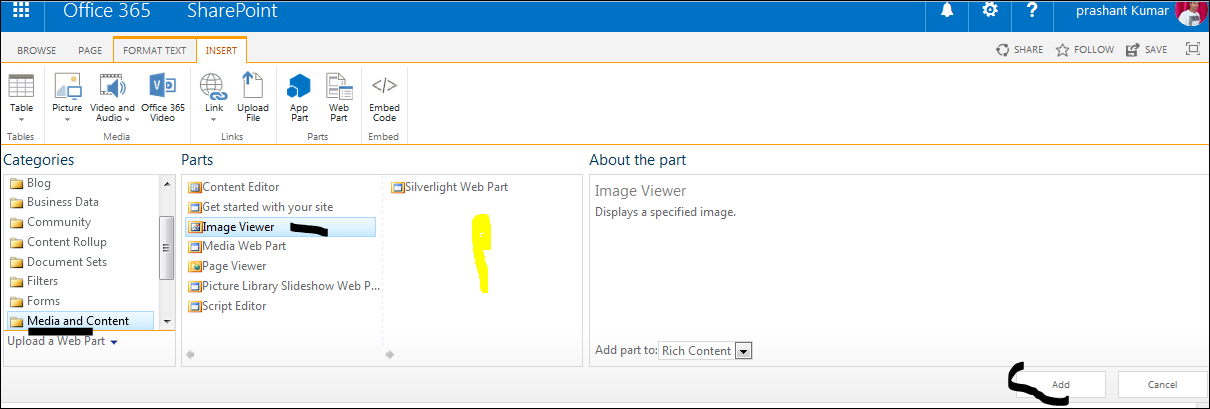
Adding Image from Web Part: we can add Image from web part available in SharePoint.
  • Just select Add web part and select Image Viewer from Media and contents and click on add.
  • Once web part will get added select web apart, edit the same web part and assign the image URL from saved path, click on Apply, and ok. See the Below Result and steps in the screen shot:
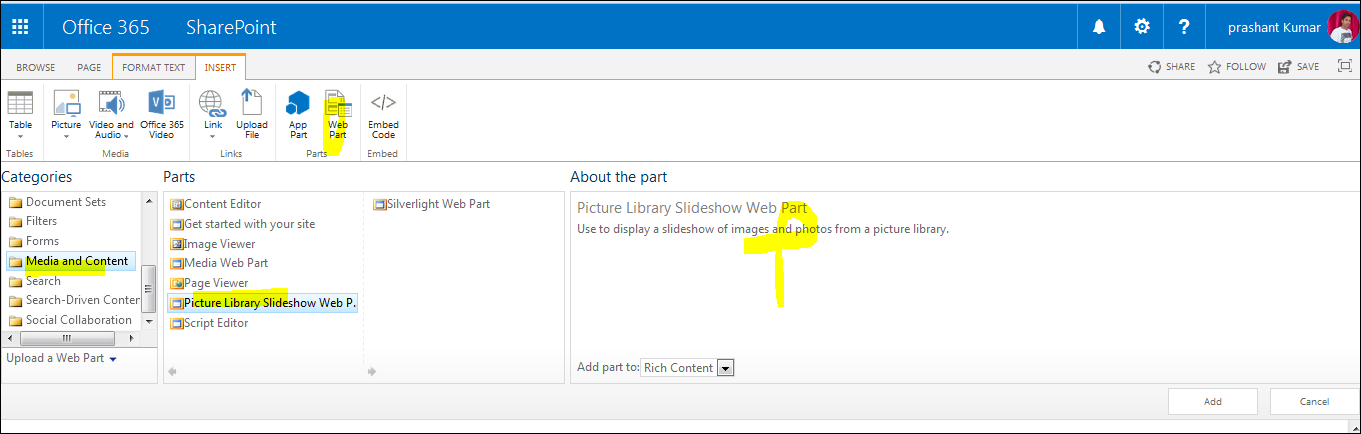
Adding Image from Web part called Picture Library slide show:  We can add images as slide show in the same page or Site.
  • Click on page or site and edit the same, click on add web part from insert tab and drop down for the media and content under this web part we can see the sub web part called Picture Library slide show is available just add this.
  • Once Slide show is added configure the by edit web part and assign the folder or path where many of images are uploaded.
Adding Images using Site App Part: We can add images to SharePoint site using App Part.

Adding Image Slide show from Apps in the SharePoint from SharePoint Store:
We can add image slide show from Apps also, this will be free version Just Navigate your site contents and select your SharePoint Store.
Search for Free Slider App, and click on Add it.

  • Just click on the app and add it to the site.
  • Once it will add will prompt us for Trust this app, click on trust this app and click on create App List from Site content:
  • List has been added, now we need to configure this App.